Project brief.

Key Points
-glass and metal theme
-based off a location or landmark in the north east
-needs to be 100 years in the future or past
-needs a rich diverse environment to explore.
Mood boards.
So I started by making some mood boards of different things to try draw inspiration. I firstly made one about the theme glass and metal and then one about landmarks and places in the north east. I then created one for the north east in the past as we were certain as a group we would do the past.

here is a mood board for the materials tat the project is themed around so as we are from the north shipyards are very close to home and may be a part of our game but we may draw inspiration from this later.
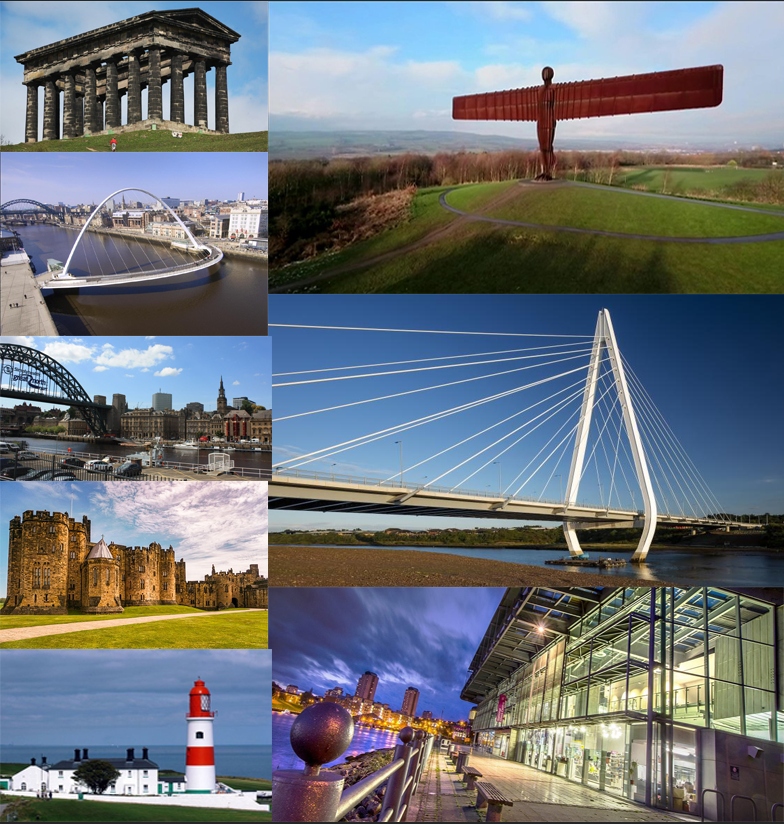
Since the brief talks about basing the game around a place or landmark in the north east here are some example of the most famous in the north east Just pointing out one the glass center may be a great way to fit the theme as it is in the north east and is glass which is one of the materials in the theme. It would fit nicely.

Here is a mood board of the northeast in the past . as our game is going to be set in the past I think these images of well known places which we may work on in our scene will be useful for making our scene realistic and feel authentic. And if not we can draw inspiration from the buildings and architecture to add more authenticity to our scene.
So now i had done this as a group we started exploring ideas of what our game could be and we came up with 2 basic concepts that we could develop on.

So a brief summary of both ideas our group came up with. the first idea was to have a game with mirrors which transported you to different worlds. These worlds could be anything we wanted them to be and we could stitch them all together efficiently to create a game. The idea was to be able to progress through the different worlds maybe in a chronological pattern.
the second idea was more focused on gameplay and you played as the angel of the north and had to go around collecting metal and glass to craft and survive the environment.
I preffered the first idea and as a group we came to the consensus that the first idea was better as the project is focused more on creating this interactive world instead of gameplay and it made not much sense nor could we expand any ideas on how and why the second idea would happen.
So moving forward we had this basic concept of the mirrors and moving through worlds and we started formulating and working on the idea as a group.
Our Idea
After some talking we finally got an idea we wanted to do. SO the story of our game is you are a 90 year old man and the game is in 1990. You are a man suffering from dementia and starting to forget his past memories of when you were younger. As the character you interact with paintings and go through to past memories which are black and white and you explore inside to find a key item which helps restore the memory and brings it back to color. So that is the key premise of our game and the idea we finalized
Deliverables and milestones.
A deliverable in a game is a stage at which they should be able to show off what they have on a game. Some examples of deliverables are . First level made , beta stage , alpha, final game. These are all examples of deliverables and every project should have some and they can vary at what they are and how many there is. A milestone is something a team should aim for in a project a stage that they should reach in a certain time. AN example of a milestone could be. First scene completed. every member should know what they have to do and how to contribute to the milestone. They should be a spaced out and if over a week broken down. These should be monitored to see if progress is being made at the right speed
ISIW 2 Be able to use traditional techniques and digital processes to produce 2d art with accompanying sound for an imagined world concept

Here is a 2d concept art for one of the scenes . as our scene is going to be a 1900s train station I designed a train station and using inspiration tried to draw it in an old style with coal powered trains and old buildings and tracks.

I developed this pieces and brought it into premiere to add sounds and music onto it to further present the ideas we have for the scene here is the final piece.
Research
SO for our game we wanted to go for a semi realistic feel with our artwork and drew inspiration from games such as “Everybody’s gone to the rapture”
this is the game we are drawing the most of the inspiration from as it is set in England and it is a story based game I think it would really work for our game and our art style is gonna be quite similar but a little drawn back to match with our deadlines. I think this is what’s best for our game as it is quite a deep story game about a man remembering his past life and I think the realistic approach will make it more profound and not seem as just a joke and maybe make the player feel for the character and his experience
Programming technical considerations.
1.Which engine or programming language. its strengths and limitations?
We are going to be using C# Programming language and we are going to be using unity. For our project there aren’t really any limitations with the software which is the reason we have decided to use it. The software has great strengths all around and will be good and efficient for us to use for the entire project.
2.What version of the software are you using?
We are going to be using 2018.2.21f version of unity along with visual studio 2017.
3.How will your files be structured and named and how will they be backed up?
All the files will be named their respective names and structured in a neat and tidy way so that anyone can go in and see what is happening on the project. The project will be backed up by builds throughout and different versions of files incase any corrupt and we may use source control so everyone can work and it can go efficiently.
4. How are you planning to spread the work between multiple coders.
I am the only coder in our group for this project so all of the coding work will be mine. But with the use of trello and deadlines I will keep on top of the code and work at a good pace to get it all completed and working.
5.In what format condition and resolution will you need assets from your artists?
As we are going for a more realistic game we are going for realistic but simple models and textures so textures that look good but dont take to my resources. I will need the models in fbx so I can import them in and then all the texture files as a group so i can put them in their designated channels when creating the material to apply inside unity.
Coding conventions.
A conventions is a way code should be laid out to make it neat profession and to help in the long run
Variables- All variables star lower case and are camel based 2.all private have a _ at the front
Functions- All functions have a capital and are camel cased. All functions have comments above them
Properties- All public variables are properties
Classes- A classes are camel cased
Brackets- A or B are fine as long as it is consistent.
For my project and work i try and stick to this way of laying out
Public
Beta Document Questions
For a beta stage of our game we would have a document for testers to fill out with the following questions.
What did you like about the game? This is to see what we did well and we dont have to focus on
What did u hate about the game? This encourages them to be brutally honest so we know what to work on and do to the game
What would you change about the game? This is maybe to get their ideas as they may have a good idea to help make the game better for our consumers.
Did you know what you were doing in the game? This is to see if they grasp the story and know what they are doing.
Did you get stuck at any point? To see if there were any parts that they were stuck so we can maybe make it more accessible.
Game design document
So before we started making and developing our game we have worked on and made our game design document as linked below for you to see and read. We have a detailed and good idea for our game and know what we need to do as a group and individually and what we need to do.
Starting the game
So to start the game and start the process of getting a fully built game I started with a simple platform and on this i wanted to create a character that could actually move and look around. Its the basis of most games an actual way to mo0ve around and look around. So the components for making a character is we need a model which the character will be and a character that will be used as the eyes and to look around.
We used this a s a quick simple model as we wont actual see it

and then positioned the camera at eye level to get the effect of it being a person that’s walking. Next my job was to create the actual system and to do this was quite simple and here is the code.
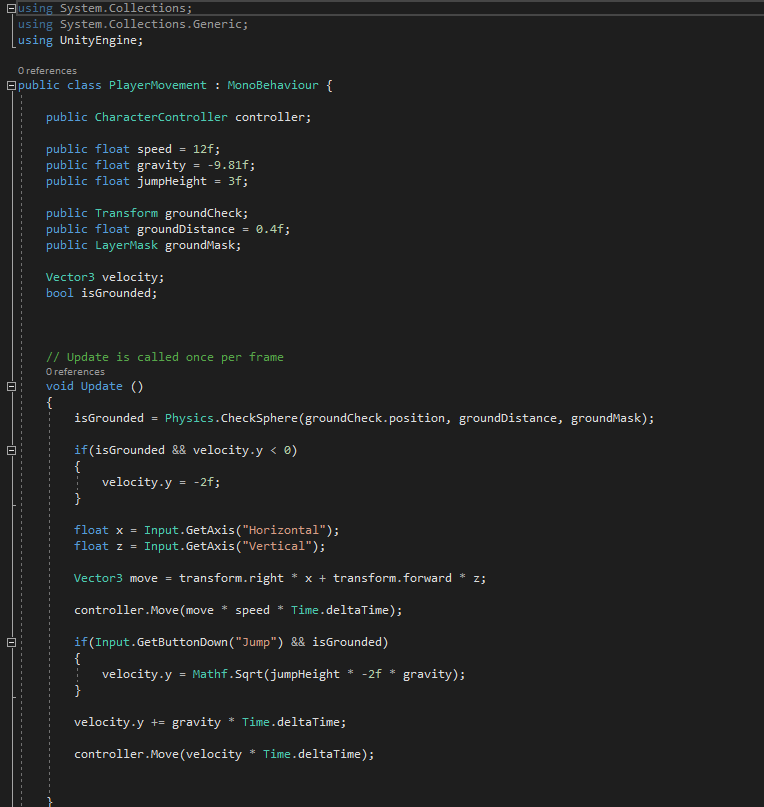
So This script is attached to the parent in which every component of the player is in. So this code looks complicated but it is simply used to move the character in its simple directions and this is used with another script that is attached to the camera to make movement and being able to move around. So this script may look over complicated due to the is grounded and the way the jump works so I’m going to explain how it works. so to stop a player from being able to jump when still in the air etc. what this does is make an invisible trigger which senses the ground and things tagged ground and if the player is touching the ground it then allows the player to jump. So this script allows the character to move and jump but not look around. To do this we have another script on the camera which is this.
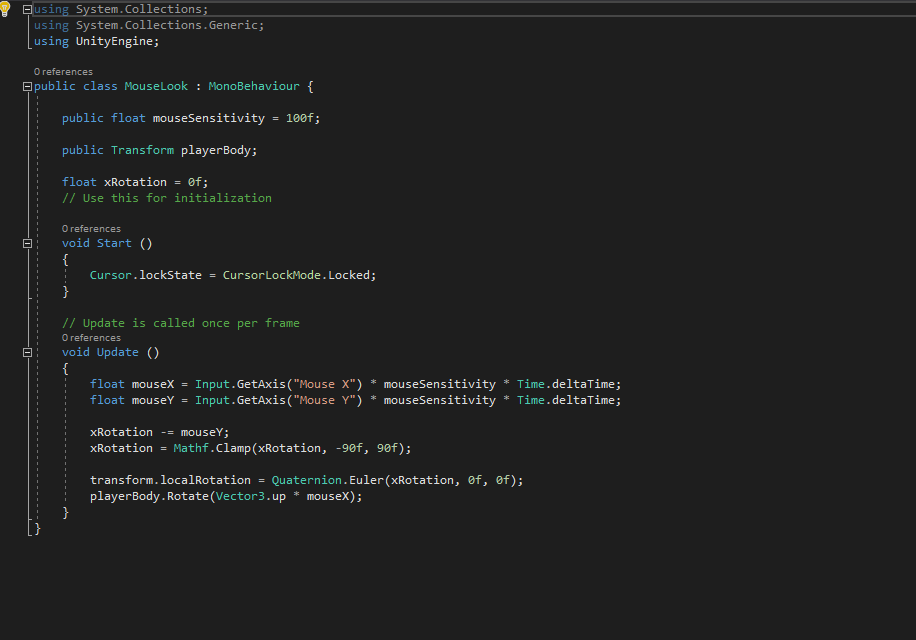
This simply is what makes the camera move. SO the camera moves as you move your mouse and is how you create the simple system of looking around in any direction. and when these 2 systems together you have now got a 3d character controller. Here is the movement working.]
So now we had the basic movement and jumping made and working i now wanted to add a little detail to add some realism and life to our character and add a head bob. SO instead of just smoothe floating a head bob really makes and adds a feel of realism as if it is a real person moving. SO to do this we needed to make 2 animations with the camera one for the left and one for the right as if its each step is a different direction. The animation had to be very simple and just had to be a few degrees tilt. Once i had done both of these all i had to do was create a game object in which the camera would be a script too and implement the 2 animations with a bit of code. Here is the code we needed split into 2 so i can explain.
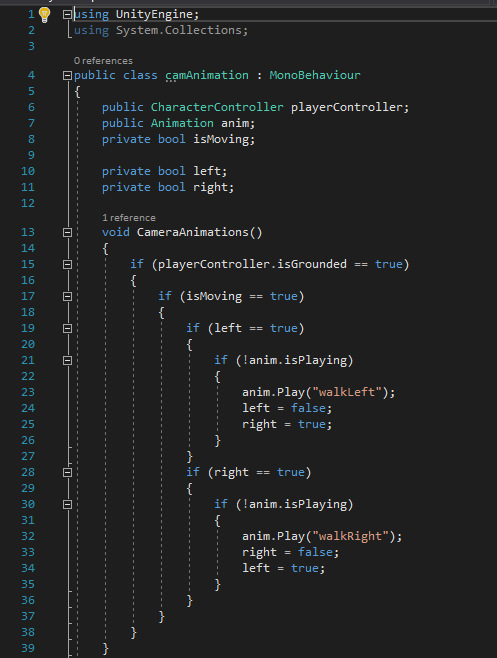
SO here is the code that actually plays the animation. What it does is it plays the left animation first then the right and it does this by alternating between the 2 and instantly turning them off so once one goes the next will go. SO for example if the left animation is playing the right wont but the second the left finishes the right will start and so forth. And this is what created the bobbing effect for the head. However at the moment this is a loop and will keep going even when we stop moving so this is when the second part of the code comes in.
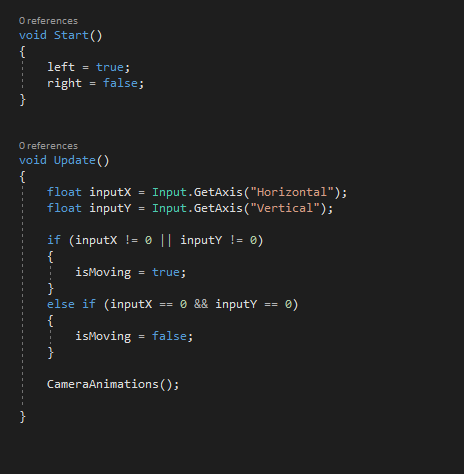
this part is very simple as this is detecting movement and if the movement input = 0 then the animations stop playing but if there is any input or anything the animations start playing. So this is how i turned my character controller into more of detailed one by adding this effect and trying to make the character feel alive. here is a comparison of with and without the head bob


So in my opinion the headbob is really effective and really adds that depth to our game that we want. And if the headbob didn’t look right its simple to create new animations and just attach them as we did the previous and this can be finetuned however you want. However I liked our head bob and how it looked so we didn’t change it.
So now we had our main character made and we could now explore and go around the scene. My next step was to create the first primary scene in this case was our bedroom. This would be where the player spawns and kind of a hub to other scenes and memory’s if we did make more than one other. Our modeler garret had a few of the models done and with some simple shapes I made and put together our room. there would be more to come but for now it looked good. here is the room.
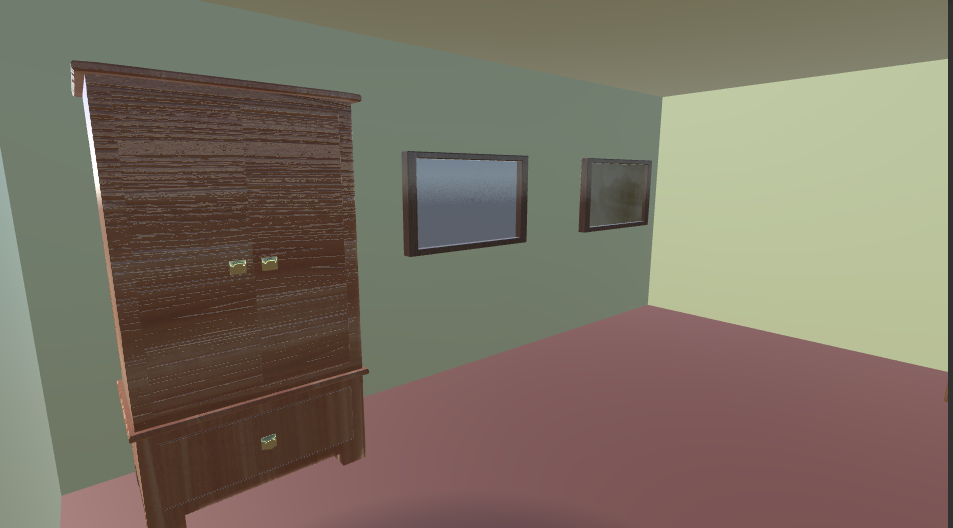


As you can see i think our first scene looks really good i think the models looks great and the way the room is put together looks good. If we have time more additions could be made to the scene but for now its great . But yeah i just simply put the assets around to make a nice looking scene. One thing i did do was add box colliders to all the objects so that the player couldn’t walk through them so our game isn’t broken or unrealistic.
So at this stage we have an effective character controller with a nice bedroom scene for the character to start in. The next few scenes would all be to change between scenes and go through the game correctly. SO to start we went back to the beginning we needed a main menu. This would require music the actual ui and me to code it and make it work. SO this was very collaborative and would need 3 of us to make it.
So after lewis and tyler had sent me he music for the menu and then the actual UI images we would use it was my job to implement them and add them to a new scene. and then create a script that makes the buttons have functions
To do this I created a canvas as normal and created 2 buttons for the start and exit. i then added an image panel for the title and another image for the background so this canvas would have 2 images and buttons. I then implemented them to their correct channels and positioned them and this was our menu.
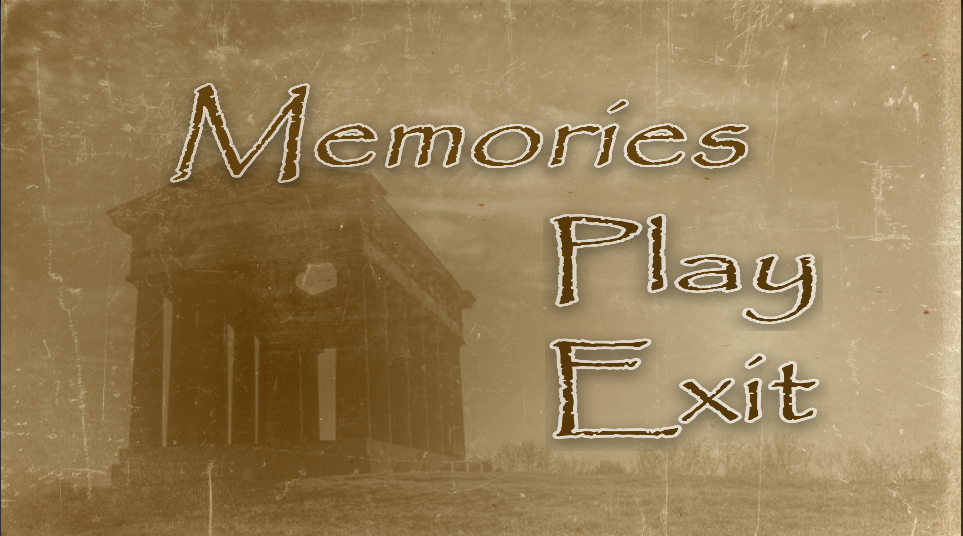
As you can see i think this is really effective and looks great for our game we firstly have that olden feel to it with the background and the papyrus font. This font is the one we will use throughout the game to keep with our art style and feel. But in summary i think this scene looks great and also i attached an audio source to the scene and put the audio clip in the channel. SO now we had a nice scene with the music playing.
The next step was to add a very simple script and the functions to each buttons. this is the simple script and then here is a video of our menu and the music .
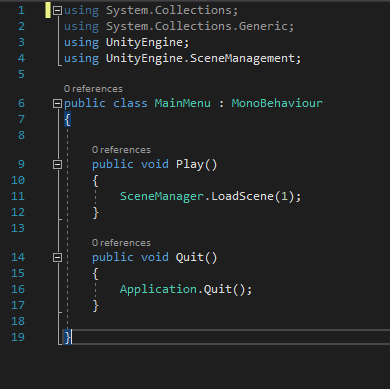
So here is the script which makes a play function and a quit function. so the play changes to the next scene and quit exits the application. And here is the scene with the music and its working.
____________VIDEO OF MAIN MENU__________________
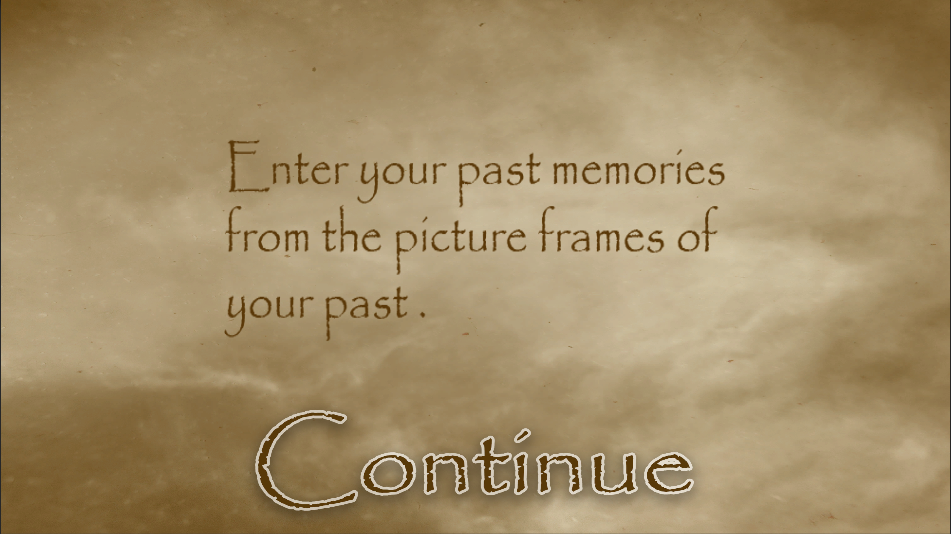
The next step for our game was to get all of the scene changes in place and working. SO basically we would be using this same method to create 2 information screens that when you click continue you go to the next scene. This was a simple job and all I did was create 2 new scenes and attach similar scripts to them and make buttons. We then called these tutorial one and 2. This is what they look like.

At a later stage we would get the text added but we weren’t sure what we wanted at this point so we will do it later. But basically these will guide the player and help them know what to do and when they are ready they can press continue to start. There will be 2 of these. One between main menu and the bedroom scene and then one between the bedroom and train scene. This is used to help the player so they know what to do and makes the game more accessible. Here is a gif of the scene change.

Ok so now that we had these scene changes done now i had an important one to do. I had to actually make the interactable picture frame. SO this would have 2 steps firstly i wanted their to be an area that when u walk in a prompt will popup on screen. This script would also be used a few more times for different things. And then i actually need it so when im in this area and press a certain key. It will change scene. Ok so firstly we worked on the prompt. I started by creating just an empty game object that would be like a trigger and look for the player entering and then i got a prompt image from our artist and I implemented it. This is what it looked like

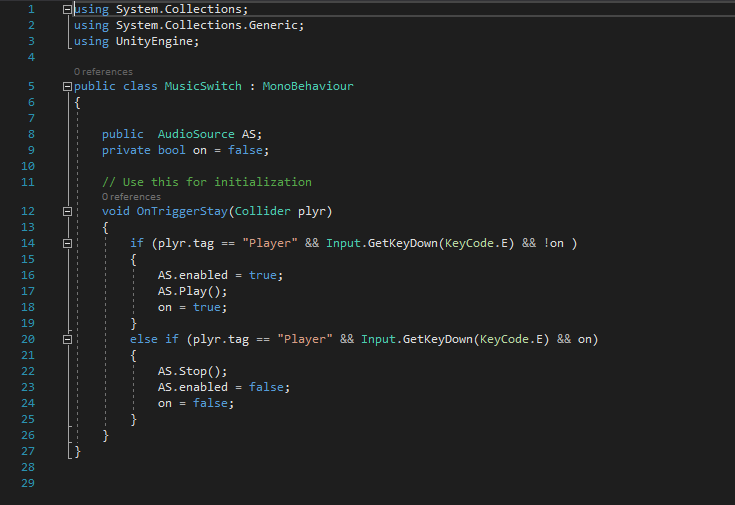
So atm this would be showing all the time however we only wanted it to show when we were in the area in which the scene change will work. To do this we needed a little script and here it is.
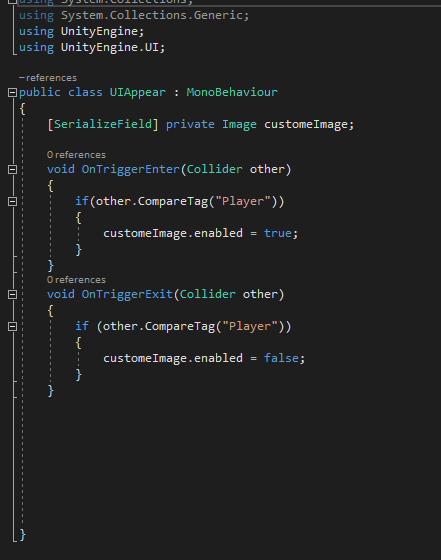

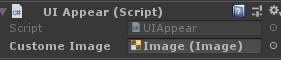
This script is very simple and makes our thing work and i will explain how it works. SO basically we attach this to our trigger game object and what it is doing is is it is enabling and disabling the image we made. SO if the player enters the trigger it turns on and when the player is out of the trigger it turns off. Its very simple but works well and we can reuse this with different images as you just have to attach and drag the imagine into the inspector
Here is a gif of the script and prompt working.
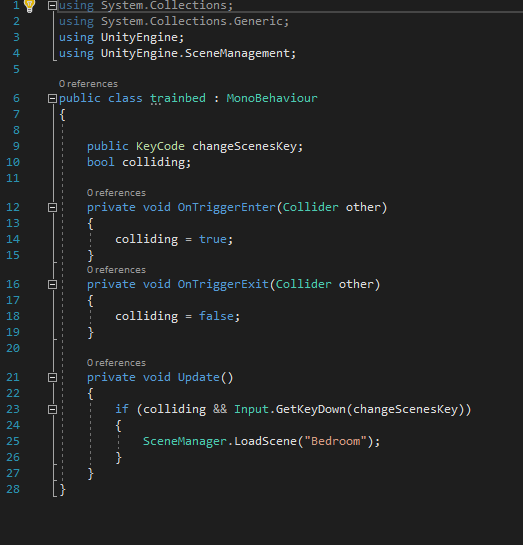
Ok so now we had half of this done and now we just had to make the actual change scene. So this would be applied to the same game object as the prompt and we had to make it so when u enter this area and press a key it changes scene. So here is the script that i made to do this
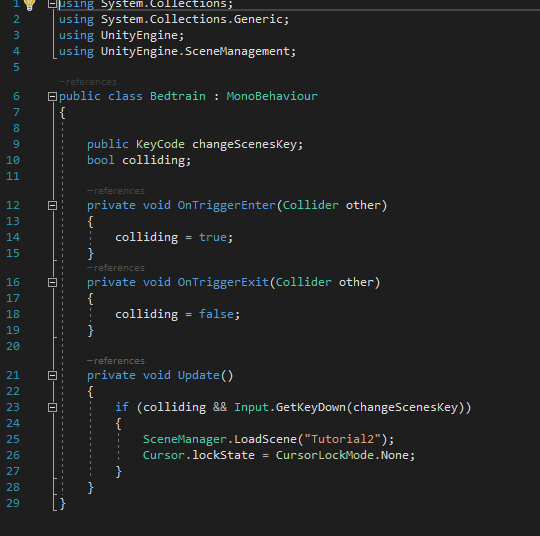

So this is also quite simple to explain it is firstly got a bool got colliding then setting the conditions for it. So if the player is in the trigger it means colliding is true and if it isn’t colliding is false. With this it is then saying if the colliding is true and the player presses E then the scene will change. SO basically when the player enters the trigger if they press e the scene will change and when they leave they wont be able to. Here is a gif of it working.
So this is a great point of our game and we have made a lot of progress. We now have our system of movement between scenes working.
We now had our first scrum. I think we have made great progress and from my side of things we have done a lot and getting on well. i have got my main movement between scenes and have the character controller working and now I just had some other things to continue like a pause menu and the interactable object before I get my models from our 3d artist.
My next task was to create a pause menu. Its a nice little aspect to add to a game and will give the option to just resume or exit back to the main menu. so this would incorporate a canvas and buttons with a script that makes the menu pop up when you press escape.
So to start i wanted to create a canvas and the ui for the menu. I did this with help for tyler and I asked for 2 buttons a background and a title for the menu. Once I received these I implemented them into unity using a canvas 2 buttons and a panel. I resized them and made them look as good as i could make them. This is what it looked like at this point.
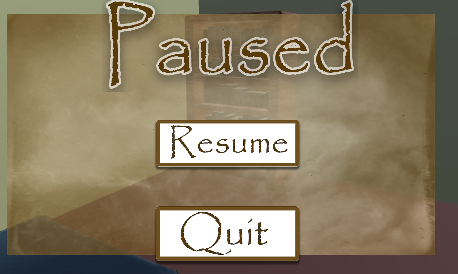
Ok so at this point the menu didn’t work and was just always on the screen which isn’t what we wanted so to fix this we would have to create a script to make the actual pause menu aspect actually work.
So this script will come in a few parts so i can explain. To start with here
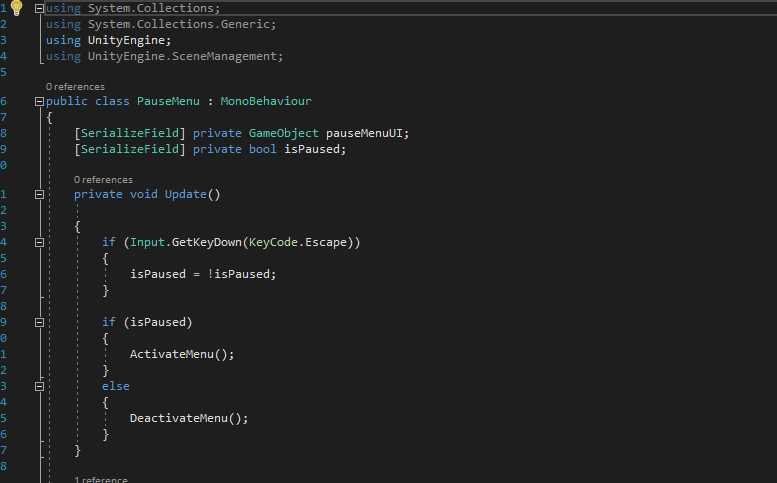
So here we are creating a bool which is called isPaused this is what we are going to use to check if the game is paused or not. We are then setting the conditions of the bool. So if we press the escape key is paused will be true so the game will know that the pause menu should be up. We are then creating activate and deactivate menu. So if is paused the menu will activate and if it isnt it will deactivate.
So at this point what we have done is set the conditions of being paused and told the game what to do either way. SO if the game is paused it will run ActivateMenu and if it isnt and its close it will then run DeactivateMenu.
So the next step of the menu is to tell the system what to do when activating the menu and deactivating the menu. Here is the script i used i will explain each part.
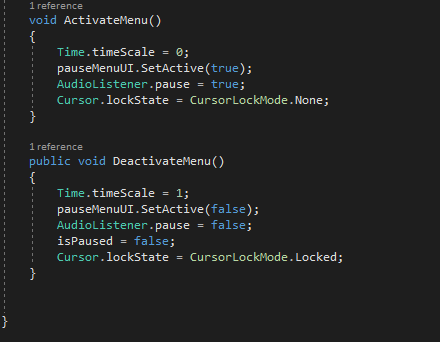
Ok so firstly the 2 time scales. SO what it is doing is setting the rate of time change in scene. o when the game is paused time stops so in the scene time has stopped and when the game is unpaused the time starts again by setting it to 1 which is normal. The next part the pause menu ui is simply turning the ui on and off so that when the game is paused we see the menu and when its not we dont see it. And after that the audio listener is simply making it so when we pause we cant hear the music of the scene etc to really make the scene and game feel paused. finally the cursor lock state is turing the cursor on and off basically when we play and move around the cursor is off so its not on our screen annoying but in a menu we need it to click buttons therefore we turn it on so we can do this. and this is basically how our pause menu works. so it will now do this when we press escape and then when we close the menu.
One final step for this menu was to make the buttons work which is very simple and we reuse basically the same script as we used for the main menu and then attach it to the buttons so that the buttons actually work. Here is the pause menu in use and working.

Ok so now we were making good progress with our game and with me doing the coding work we had music and all thee models getting made in the background. SO next we needed to start focusing on making our next scene and what we wanted to do was create a train station from the past and with our project we wanted to match thee brief. We researched some different train stations etc and places in our area and in our region and as a group we decided to base our station off.
Shildon is an old town and parish in county Durham which is very local and quite close to us. The town is very famous for its locomotive history as it goes back over 300 years. This is why there is the national railway museum in the town which shows the whole history of the locomotive history in england.

here is the museum which shows our countries locomotive history. SO for our project we had to be 100 years in the past or future so we chose past and researched 100 years in the past and what a station would look like and this is what our moddeler would base his design off.
After a little research we found the perfect image and would be the source inspiration for design. here is shildon train station in the past

So this is what we would be going off and would want our scene to look like so that we can hit the brief as a railway is basically all metal and industry and was a massive part of British history and also we have the 100 years in the past hit and also its very close and iconic in our region so we will hit the brief on all fronts. We would also be adding a train to our scene which our modeler will make to make our scene look alive.
SO with this in mind our modeler created all the assets needed and all the textures. My job as a level designer was to implement all the assests add the textures and then create the scene. I think on a whole the scene looked really good and i think the assets that the team had created was great and made our game look very good and to a high level. Here is the scene with the assets in and implemented.
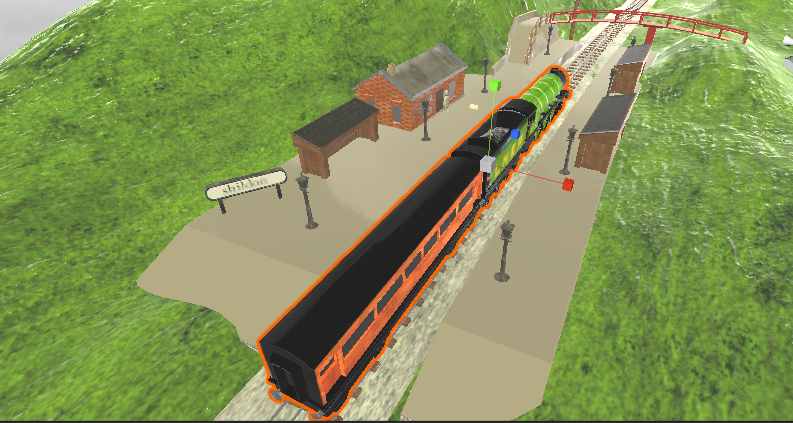

I think garret did a great job on the scene considering the time scale and deadlines. It was made to a great standard and when i put it together the scene looks great and is perfect for our game.
Now we had the base scene built we had a few things that had to be done. This would eb a full team effort and would need aspects from all specialities. So one thing we needed was the ambience music from lewis which he would create for me and then i needed a skybox from tyler which he also did.
I told him to go for a cloudy kind of weather to try fit with this old fading feel. and then he got me all the frames and pngs that i needed. I then applied them to a skybox material and implemented them and this is what it looked like
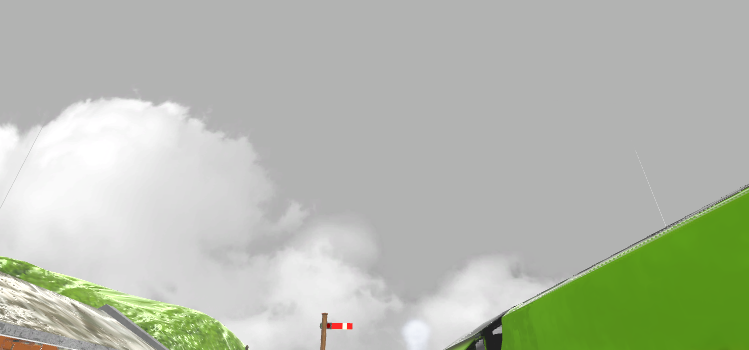
I think it looks really effective and rally helps make the scene immersive and work well. I think Tyler did a great job on it.
Next was the ambient music from lewis. He also made this for me and I applied by just putting it on an audio source and letting it play when the scene is loaded here is the music playing in scene.
Finally i had to quickly add colliders to all the assets so our character didndt walk all fall through it all but this was very simple by just adding mesh collider which just wrap around the models . I could use basic colliders for this as the shapes are very complex and this would waste unnessacary time so i used mesh colliders on all the models.
And now at this point we had everything and the scene was made and to a great standard with all the models music and skybox all in and working we could now walk around and explore the scene.
So now we were at the point where we had our main scenes built and were at the point in which we could now start working on the collectable object and the making the game work.
So for this I had a goal I wanted an object that when interacted with by pressing e it would disappear , a sound would play then it would activate the door home which means you would be able to go up and go home. Also i wanted a shader to make the scene black and white and when the object is collected for the scene to change back to color which I think is a nice touch and feature that will really present the effect of the memory coming back.
So the first thing I wanted was the shader. Shaders are very hard and I have 0 experience with them so I struggled for a few hours in the shader editor and with coding one so i got help from Dan to help create the shader. I told him what I wanted in the shader and he created the script for me. I would then be able to use it however i wanted and implement it into the scene the way i wantedf.
Here is the shader that i needed and makes the scene monochrome like a black and white effect.

I may end up using this for future projects as black and white is always useful for a plethora of genres. Ok so to make this work all i had to do was drag the scrip below onto my camera.
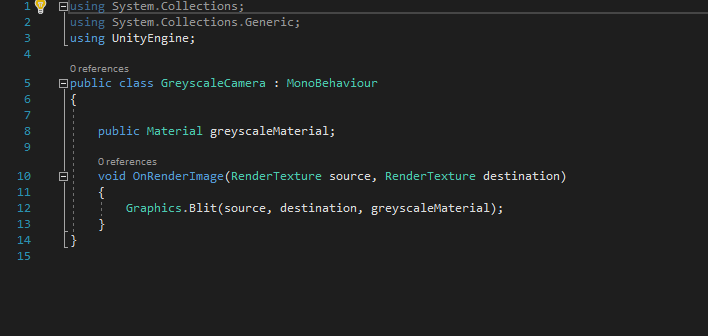
which is basically just calling the shader to be applied . And then dragging the shader onto a material then into the script. It was quite simple to setup once i got it and here is the effect in action in our game.
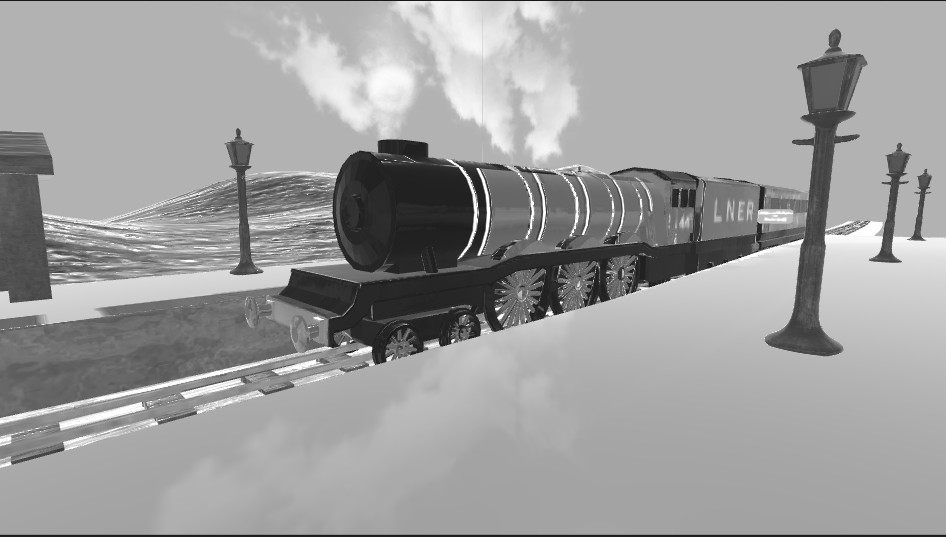
this is the shader in the scene. I think it works really well and is the perfect look i was going for and i think it works well when showing the faded memory effect.
Now that we had this we now just had to create a simple script for the interactable object. It would be simple script that when the object is clicked a few different things happened.

Now this script could definitely be more efficient and work better but it works and makes the scene work as intended. So basically we are gonna be able to drag the different game objects and music etc into the inspector under each category and then this script is simply doing it. It is checking if the player is in the trigger and if they press e. If that happens it runs and does all of this. It is simply destroying the object and the shader cam which will turn the scene to color. it is then playing the pickup sound once which is a little tune lewis made for the game and then the last part is activating a game object which will then be the way home. So in full this little script is making the game work.
So along with this i needed another trigger and a little scene change script so that the player can go home. here is that script. as you will see its the same format as the script used many times . its a copy of the picture frame script.
It is simply checking if the player is in the trigger and colliding and if so allowing the player to go home.
Ok so now we had one more step which is the easiest and is simply doing some more ui prompts. this uses my same ui prompt scrip and we just add the 2 new images that tyler made
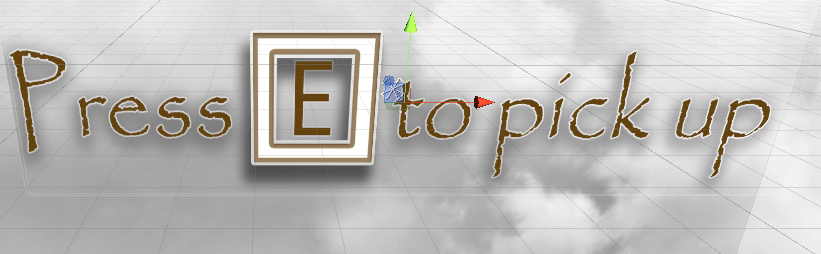
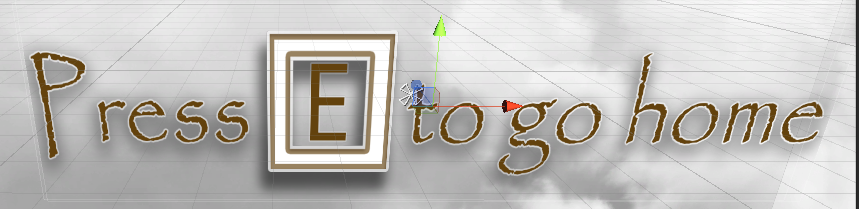
These are the 2 images going by the same format and font as before to keep our consistency and by using the same ui script and attaching it to the trigger we now had our working system for the game.
Here is the system working in game.
So now we were at a great point in the game we had most of the systems working and everything was going smoothly now it was time to refine our game in the final few days of our project. If our project was longer we would be able to make this game bigger with more memories and scenes but for now and this project would have to do with the one memory.
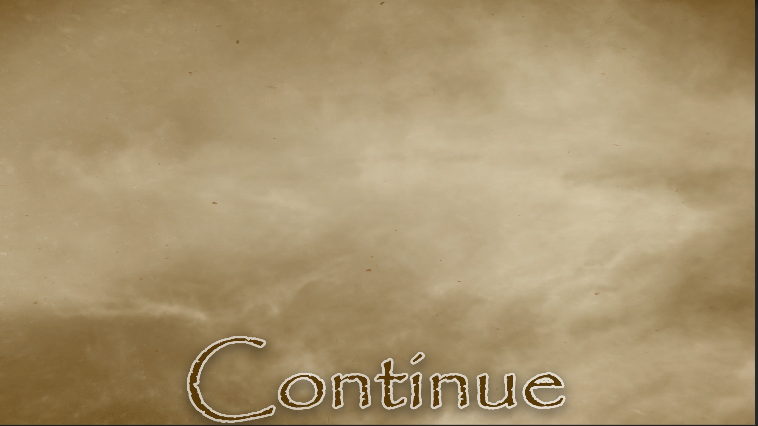
So now I wanted to do some polishing and with an mvp build I wanted to just add little things to make the game better and nicer. SO the first problem I saw in our game was accessibility. There was really no info given on what to do or what was happening therefore I made some new scenes between the main menu and bedroom then the bedroom and train. These would tell the player what to do and help the player understand the game. these were very simple to make and I got Tyler to make continue text and then i did the rest to make the scenes. I just once again used buttons to move between the scenes and used the move scene script as i have many times. here are teh what the 2 scenes looked like.
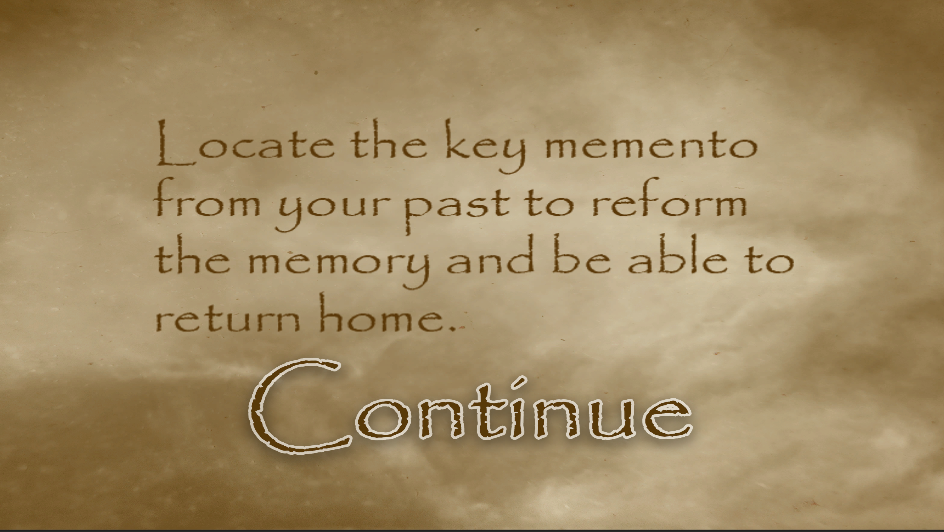
So yes this was just a simple addition to try guide the player so they know what to do. I think this simple change just increases the accessibility of the game.
Next i wanted there to be some variation in the gameplay so i created a random spawn script. what this would do is the collectable would span at a random location that i had pre defined in a list. here is a scrip that i used and here is the values i put in the inspector.
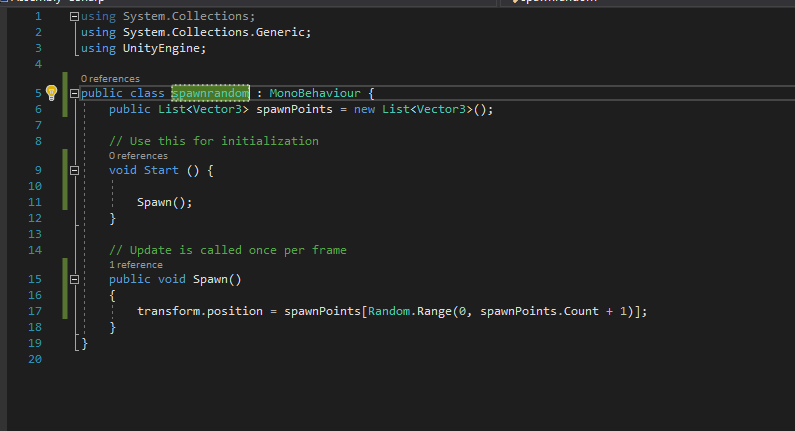
So as u can see the script is firstly creating the script then saying that the object that its attached to will spawn in one of the random locations. then here is the list in the inspector.
I finally added a couple little additions to the bedroom such as a working light and music box here are the scripts for them. It simple just uses a trigger and checks for as tag and if the player id there and presses e it will play the music or turn the light on.
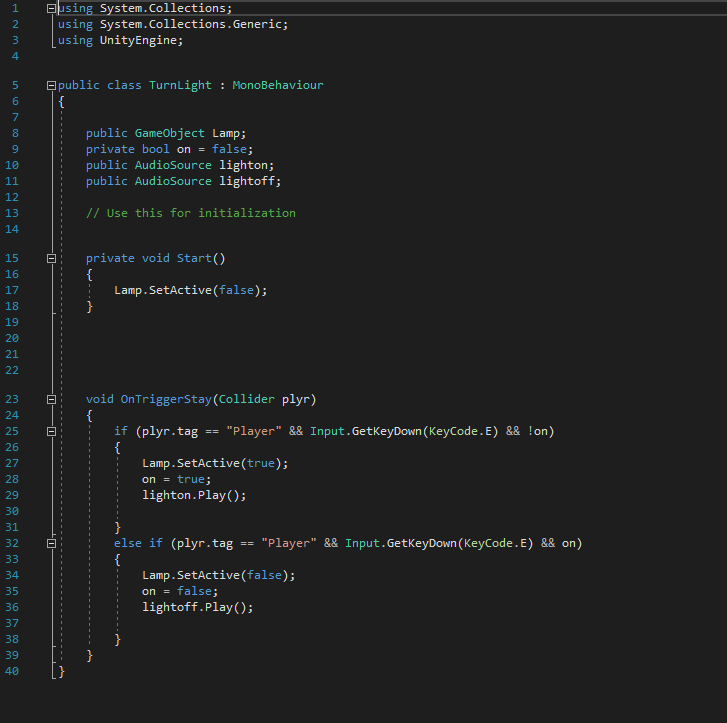
this is for the lamp.
And here is the music box. Like I said it doesn’t add much to the gameplay or anything but its a nice little addition to the scene. Anyway that is our scene and game done as we have hit the deadline here is a build of the game that we got done.
Here is a link to a zip file to test the game
https://connort.itch.io/imaginedworlds
Evaluating the project and evaluation.
So now our project is done it is time for me to evaluate it and see how it went.
Burndown chart

Here is the burndown chart we kept during the project. As you can see in the end we accomplished all our goals and got a base game out with some polishing by the deadline. However it was very close for time and we were behind a little at one point. This meant we were under pressure the whole time which made it hard for us to do. But in the end we got it all done. One thing about this project is the timing i believe we were given too much time for pre production and not enough for actually making it which i think was a factor on why we were under strain and pressure through the project. I think next time we need to put more time towards production and a little less towards pre production
Post Mortem
What went well.
I think the project in game as a whole went quite well we have created rich lifefull scenes in my opinion and the game as a whole works as we wanted it too and all the code works. Also i think as a group e worked well in our different specialties and this has helped us create a game and have it done by the deadline.
What didnt go well
I personally think the game could have been bigger with more scenes etc but this came down to time management and i think maybe we didn’t do enough thought when it went to the quality of assets and the time we had. due to this i think instead of a lot of scenes and more gameplay we had one scene. but i think the random spawn maybe adds a little and makes this less of a problem.
Summary
In summary i think as a whole te project went quite well. we met the deadline and created a good quality start to a game and with more time and a bigger team this definitely could have been a good high quality game that we have created. I think as a team we worked quite well and worked together to get all our tasks done and with good communication and management i think this is why we created and met the deadline for our game. I think we did face some problems some unavoidable but i think some could have been avoided with better time management as I believe we did too much time on pre production and not the actual production. I think if we spent a little more in development by the deadline our game could have been a lot better. So I think for future projects this needs to be a focus and i need to balance my time more so that i know i wont be under to much pressure which can cause mistakes
